Manage certificates
Add multiple certificates of completion to your TrainCaster LMS environment. Administrators first create certificates. Course Managers then select the certificate to use for each course.
Certificates are customized in two parts: first, a background PDF is created that includes the border and artwork for the certificate. Then you lay out the information you want to see on the certificate. Detailed instructions are below.
To create a new certificate:
- Create a PDF document, 8.5 x 11, that includes the background art you want to use on your certificate.
- Click 'Course Certificates' on the main Administration page.
- Click 'Manage Certificate Templates'.
- Click 'Add' and select the PDF file you created in step 1. Click upload.
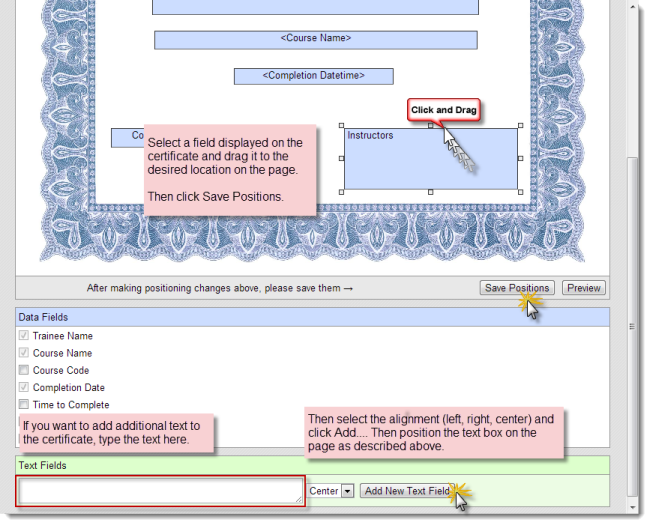
Now you'll need to position the information you want to display on the certificate.
- From the Manage Certificates page, click layout.
- Select the data fields to display on the certificate, and position them on the page.
- Add text fields as needed, and position them on the page as well. (e.g. This is to certify that).
- Click 'Save Positions'.
Set default certificate orientation:
- Click 'System Settings' on the main Administration menu.
- Click 'General Settings'.
- Select 'Portrait' or 'Landscape' for certificate orientation. Click 'Update'.